High-horsepower “crate” engines from the “Big 3” and full-bore race engines from the likes of Reher & Morrison, Scott Shafiroff, Steve Schmidt, and countless others, have tempted many racers to just buy an engine, rather than building one themselves. After all, what could be simpler than just laying your money down, installing the engine in a car, and going racing?
However, not everyone can afford to spend tens of thousands of dollars outright on a pre-built race engine.
Many enterprising and budget-minded racers still build their own engines, often working in conjunction with a reputable machine shop. Most of these racers have been assembling their own engines since they began racing and can be just as competitive as the drivers with the “store-bought” engines.
While selecting the parts and building a race engine may seem intimidating and even overwhelming at first, the entire process can be very rewarding. We recommend calling on a trusted fellow racer friend with engine-building experience who can get you started and keep you going in the right direction. Building engines involves an extensive learning curve, but no price can be put on the pride and experience gained. Don’t be afraid to ask questions. Even the most experienced engine builders have been known to consult with manufacturers’ technical personnel to help with the parts selection process. Most aftermarket companies have tech lines for this reason, and these people are always more than willing to help, particularly if you’re looking to purchase their product. Make sure these tech guys know where and what you plan to race, and how quick and fast you want to go, and then follow their recommendations.
One of the most important prerequisites of building any competitive race engine is choosing a good, reputable machine shop. Well-known shops that specialize in racing engines are usually good places to start, and don’t be afraid to drive several hours to a prospective shop if there are no local ones. Keep in mind, too, that shops specializing in stock rebuilds generally don’t have the most modern equipment, nor do they pay the salaries necessary to keep the best machinists. At the end of the day, you get what you pay for.
Load up the new internal goodies (pistons, rings, bearings, etc.) and get the whole shebang to the chosen machine shop well before the assembly phase is scheduled to begin. Make sure the machinist understands just what it is you want from this engine. And, don’t drop an engine off in March, when shops are their busiest, and expect it to be ready April first. You’ll only be fooling yourself.
Once the machinist is turned loose, the usual process begins with hot tanking the block to clean it thoroughly. Magnafluxing is highly recommended to check for cracks. Boring, decking, honing, and installation of new cam bearings and freeze plugs all take place next.
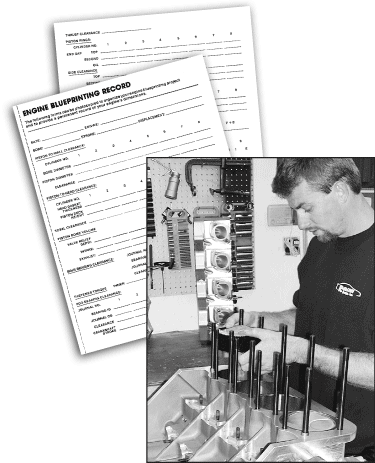
During the time the engine is at the shop, do some “homework” and review the assembly process. A pair of reference books like those from S-A Design entitled “Engine Blueprinting” by Rick Voegelin and “Power Secrets” by Smokey Yunick can be excellent study guides. Both books cover all phases of engine building from the all-important basics to the steps used by seasoned engine builders. “Engine Blue-printing” even includes log sheets in the back that can be easily copied and used to record every aspect of the engine’s assembly process. Thorough, accurate record-keeping that tracks component selection, specifications and tolerances for an engine, and any performed machining processes will yield valuable reference material for future engine building efforts.
When the engine is back from the shop, the assembly process will go much more smoothly if you can gather up a number of specialized tools. We recommend a sturdy engine stand, a quality torque wrench, deck plate, piston ring installation tool, piston ring filer, a set of micrometers to measure the crankshaft journals and pistons, a dial bore gauge for measuring cylinder bores and bearing clearances, a dial indicator with a magnetic stand for degreeing camshafts, checking deck heights, etc., and most importantly, a neat, clean work area.
Inspect the work done by the shop by checking main and rod journal sizing, particularly if the crank has been ground, and confirming piston-to-wall clearances is always good a idea prior to final clean-up and assembly. As you become accustomed to using the above-mentioned tools and feel comfortable that you are obtaining accurate readings, you will quickly see the quality of the machine work you’re getting. Install and torque down the deck plate (available from companies such as BHJ) to simulate the stresses of a bolted-on cylinder head and check not only the piston-to-wall clearance, but also how straight and true the cylinder walls are. Cylinder walls .002″ – .003″ or more out-of-round or that are tapered may be acceptable for the grocery getter but will never provide effective piston ring sealing in a race engine.

Don’t be intimidated by or skip over relatively simple chores like file-fitting piston rings or degreeing the camshaft. Sure, they were never performed on the assembly line, but they are examples of the difference between standard engine building and true engine “blueprinting”. No true racing engine would be competitive without these basic tasks performed and all may be easily learned by simply picking up one of the how-to books previously mentioned or reading the directions that come with your piston rings or camshaft.
If you take your time and exercise patience, you’ll know in your own mind that everything was done right. The ideal time to build a race engine is during the off-season when things are not so hectic. It’s no fun trying to get machine work done in the spring or summer when shops are busiest and then trying to quickly assemble an engine in the middle of the racing season.